Unlock the Secrets to a Crispy, Flavorful Cauliflower Pizza Crust
The quest for a healthy, low-carb alternative to traditional pizza often leads to the same dilemma: how to create a
cauliflower pizza crust that's not just edible, but genuinely delicious, sturdy, and crispy enough to hold your favorite toppings without crumbling into a soggy mess. Many home cooks have tried and failed, resulting in disappointment. But what if we told you that unlocking the secrets to a perfectly crisp, flavorful, and remarkably sturdy cauliflower crust is not only possible but surprisingly easy? This comprehensive guide will arm you with the techniques and insights needed to transform humble cauliflower into a pizza base that will impress even the most devoted carb-lovers, proving that healthy eating doesn't mean sacrificing flavor or texture.
Why Choose a Cauliflower Pizza Crust?
Beyond the undeniable deliciousness of a well-made
cauliflower pizza crust, there are compelling reasons to make it your go-to for pizza night. For starters, it's a fantastic **low-carb** option, making it ideal for those following ketogenic or other carb-conscious diets. It's also naturally **gluten-free**, offering a wonderful solution for individuals with gluten sensitivities or celiac disease who crave the joy of pizza without the adverse effects.
But the benefits extend beyond dietary considerations. A properly prepared cauliflower crust delivers a satisfying crispness with subtle nutty undertones from the roasted cauliflower, often enhanced by the savory notes of cheese and garlic. This unique flavor profile creates an exciting canvas for a wide array of toppings, allowing you to experiment with new culinary combinations. You get all the satisfaction of traditional pizza, but with a nutritious twist that often includes an extra serving of vegetables without even trying. It's a clever way to lighten up a beloved comfort food, allowing for guilt-free indulgence and making pizza night a regular, healthy highlight.
The Absolute Secret to a Crispy Cauliflower Pizza Crust: Moisture Removal
This is the golden rule, the make-or-break step, and arguably the most crucial piece of advice you'll ever receive when mastering a cauliflower pizza crust: **you must remove as much moisture as possible from the cauliflower.** Cauliflower, despite its firm appearance, holds a surprising amount of water. Too much moisture is the arch-nemesis of crispness, leading directly to a soggy, weak crust that falls apart under the weight of its toppings. Ignore this step at your peril!
The journey to a dry, "cauliflower flour" begins with proper preparation. You can either buy pre-riced cauliflower from the freezer section (a convenient shortcut) or make your own. If making your own, chop fresh cauliflower florets or chunks and pulse them in a food processor until they resemble rice grains. Alternatively, a good old-fashioned box grater works just as effectively. The goal is a fine, uniform texture that will bind together easily.
Once your cauliflower is riced, it’s time for a two-pronged attack on moisture:
1.
Roast It Out: Spread the riced cauliflower in a single, even layer on a parchment-lined baking sheet. Roast it in a moderately hot oven (around 375-400°F or 190-200°C) for 15-20 minutes, or until it looks slightly golden and feels dry to the touch. This initial bake evaporates a significant amount of water and begins to develop that delicious nutty flavor.
2.
Squeeze Every Last Drop: This is where the magic truly happens. Once the roasted cauliflower has cooled enough to handle, transfer it to a cheesecloth or a clean, thin kitchen towel. Gather the edges and twist, then squeeze with all your might. You'll be astonished by the amount of liquid that comes out – it's often far more than you'd expect! Continue squeezing until no more moisture can be extracted. The resulting cauliflower should be firm, almost crumbly, and feel exceptionally dry. This labor-intensive step is non-negotiable for achieving that coveted crispy crust. This process effectively turns your riced cauliflower into a dry base, ready to absorb flavors and bind beautifully. For more in-depth techniques on achieving this critical dryness, you might find valuable insights in our article on
Master Homemade Cauliflower Pizza Crust: Crispy & Sturdy.
Crafting Your Perfect Cauliflower Pizza Dough
With your cauliflower thoroughly dried, you’re ready to transform it into a robust, flavorful dough. The core ingredients are simple: your "cauliflower flour," eggs, and cheese. Each plays a vital role in building structure and enhancing flavor.
*
Cauliflower: The foundation, providing the bulk and healthy benefits.
*
Eggs: Act as the primary binder, holding everything together and preventing the crust from falling apart. Usually, one or two large eggs are sufficient.
*
Cheese: Beyond adding incredible flavor, cheese (often Parmesan, mozzarella, or a blend) contributes to the crust's sturdiness and crispness as it melts and crisps during baking. It's a critical component for both taste and structure.
In a large bowl, combine your dry cauliflower with the eggs and shredded cheese. This is also the perfect opportunity to infuse extra flavor directly into the crust. Consider adding garlic powder, onion powder, dried Italian herbs, a pinch of salt, and a crack of black pepper. Mix everything thoroughly until a uniform, sticky dough forms. It should be cohesive enough to hold its shape.
On a fresh sheet of parchment paper placed on a baking sheet, scoop out your dough. Using your hands or the back of a spoon, press and shape the mixture into your desired pizza crust form – typically a circle, about ¼ to ½ inch thick. Aim for an even thickness across the entire crust to ensure uniform baking. This careful shaping helps create the perfect base for a delicious, healthy meal.
Baking Your Way to Pizza Perfection
The baking process for a
cauliflower pizza crust involves two distinct stages: a pre-bake to firm up the crust, and a final bake with toppings.
1.
The Initial Pre-Bake: Place your shaped cauliflower crust (still on its parchment paper) into a preheated oven (around 400-425°F or 200-220°C). Bake for about 15-20 minutes, or until the edges are golden brown and the crust feels firm. This crucial step sets the crust, making it sturdy enough to handle toppings and prevent sogginess.
2.
The Flip (A Game-Changer): For ultimate crispness, flipping the crust halfway through the pre-bake is a game-changer. This allows both sides to get equally golden and firm. Here’s a simple trick: once the crust has baked for about 7-8 minutes, carefully lay a new piece of parchment paper on top of the partially baked crust. Then, place a large, flat plate or another baking sheet on top of that. Think of it like a sandwich, with the crust as the filling. Holding the bottom baking sheet and the top plate/sheet firmly together, swiftly flip the entire "sandwich." Now, gently slide the crust, with its new parchment paper on the bottom, back onto the original baking sheet. Continue baking until golden.
3.
Top and Final Bake: Once your crust is golden and firm, remove it from the oven. Now comes the fun part – adding your favorite pizza toppings! Keep in mind that heavy, wet toppings can reintroduce moisture, so be mindful of quantities. Classic tomato sauce and mozzarella are always a hit. For a gourmet twist, try pesto with roasted vegetables, or fresh arugula and prosciutto added after baking to maintain their delicate texture. Return the topped pizza to the oven for another 5-10 minutes, or until the cheese is bubbly and golden, and the crust edges are perfectly crispy. For more simple and healthy topping ideas for your low-carb crust, refer to our guide on
Easy Low-Carb Cauliflower Pizza Crust for Healthy Pizza Night.
Beyond the Oven: Grilling and Creative Toppings
While oven-baked cauliflower pizza is fantastic, don't limit yourself! A pre-baked
cauliflower pizza crust is surprisingly sturdy enough to withstand grilling, imparting a unique smoky flavor. Ensure your grill is well-greased and at a medium heat. Place the pre-baked crust directly on the grates, add your toppings, and close the lid, grilling until the cheese melts and crust is heated through. If you're nervous about direct grilling, simply place the crust on a grill-safe sheet pan or cast-iron skillet.
When it comes to toppings, let your imagination run wild! The subtle, nutty, and cheesy flavor of the cauliflower crust provides a perfect backdrop.
*
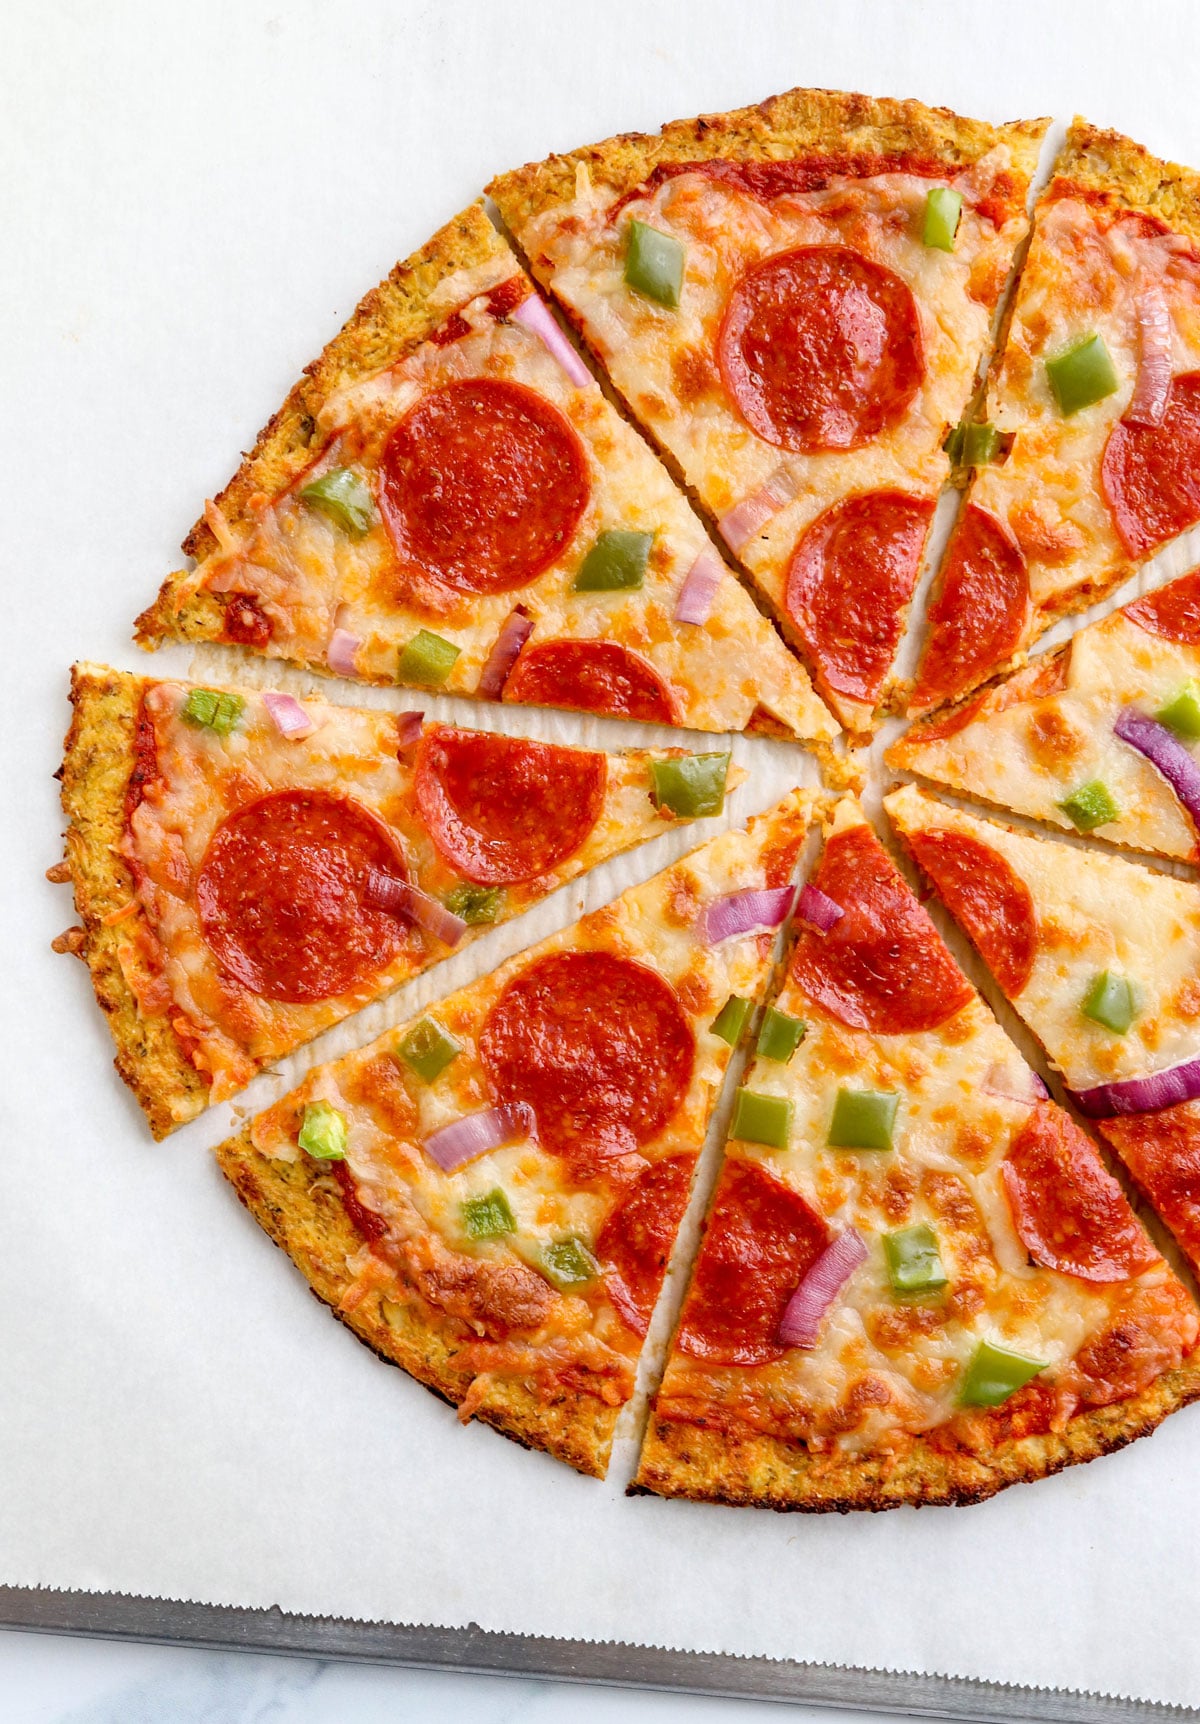
Classic Combinations: Marinara, mozzarella, pepperoni, mushrooms, onions, bell peppers.
*
Mediterranean Twist: Pesto, sun-dried tomatoes, Kalamata olives, feta cheese, artichoke hearts.
*
Garden Fresh: White sauce, spinach, cherry tomatoes, goat cheese, fresh basil (added after baking).
*
Protein Packed: BBQ chicken, red onion, cilantro, a drizzle of ranch.
*
Gourmet Flair: Fig jam, prosciutto, arugula, balsamic glaze.
Remember to add delicate fresh herbs or greens like arugula *after* the pizza comes out of the oven to preserve their vibrancy and texture.
By understanding the crucial role of moisture removal, following precise baking steps, and being open to creative topping ideas, you can consistently achieve a truly exceptional cauliflower pizza crust. This journey will not only expand your culinary skills but also transform your pizza nights into a healthier, yet equally satisfying, experience.